|
1.
Removing the Uniform
Display:
The Uniform Display Insert
is easily removed from the
back.
a. Find a large flat work
surface like a table or on a
carpeted floor.
b. Turn over the Uniform
Display Case and there are
several small metal pins on
the back
called "Points", these are
bendable.
c. Bend all the points back,
and the Uniform Display Insert
can be easily
tilted upwards and outwards
from the rear.
2. [ IMORTANT STEP ]
Creating a layout:
We highly
recommend that prior
to affixing the awards and
decorations that
everything first be
temporarily positioned on top
of the Uniform Display to
determine
the best layout and
configuration. If you just
start attaching things it
becomes complicated if you
want to move items around.
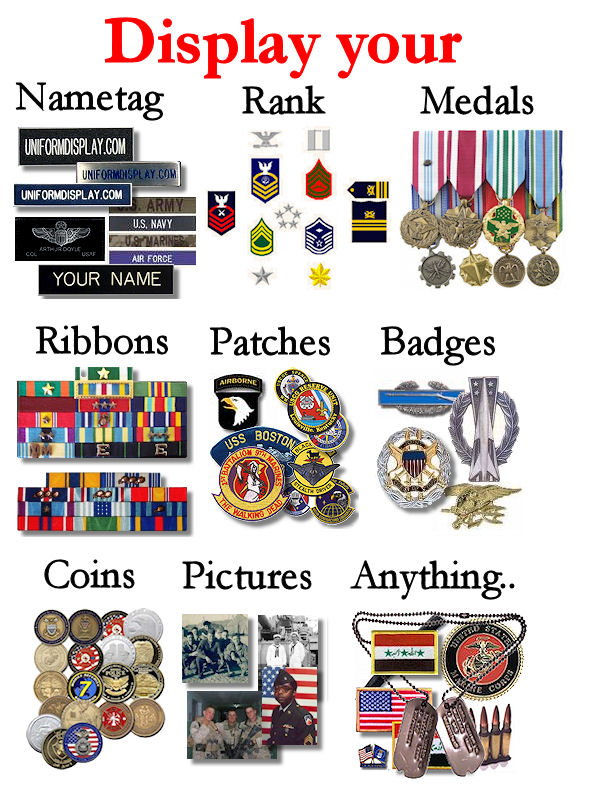
a. Gather everything together
that will be attached to the
Uniform Display
Case, almost anything can be
displayed, for some idea's
view our decorated
samples and Suggestions
page.
b. Position all of the items
to determine their proper or
desired placement.
c. This is where it can be
determined how strict the regulations
are going to
be adhered to, some things
simply look better if they are
displayed in a more
symmetrical
manner. The Uniform Display
Case is intended to display
other memorabilia as
well as awards and
decorations, so be creative.
If you have questions
about the regulations, we have
them listed here.
Think of it as a blank canvas
with the uniform as a
template, there are also the
Collar and Display Bar
area's provided for
additional items. The end
result should be a showcase of
everything you have to
display.
3. Attaching Awards,
Decorations and other
memorabilia:
Patches:
Patches are best attached
using double-stick-tape
(available from your local
hobby or office supply store).
The double-stick-tape makes it
easier to
reposition or replace the
patches if necessary.
*NOTE:
Any type of Glue or Hot Glue
may also
be used if the patches never
need to be removed, but be
careful as once the
glue dries it may tear the UV
coating and lift the ink if
the patches ever need to be
removed or
repositioned.
Pins, Medals, Badges,
Crests, etc.:
Any type of pin, badge or
medals are easily attached as
there is a 1/4 inch
foam core backing behind the
canvas.
a. Remove all of the pin
locking mechanisms.
b. Carefully position the all
pins where you want them (see
step 2 above).
c. Simply push the pins
through the canvas into the
foam core and they will
stay.
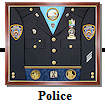
*Note
on attaching Police &
Fire Badges:
The "Badge Fastener" image on
the display is only for
example - to attach a real
badge there are two ways:
1. Remove tha Badge Clips from
the back of the badge and
attach the badge using
double-stick tape.
2.
Place the Uniform Display
Insert "face up" on a hard
surface and push
down hard on the badge to
create an indentation in the
foam backing with the pin
fasteners on the back of the
badge,
you may need to cut out some
of the canvas and foam backing
to get the
badge to lay flat against the
canvas. Then attach the badge
using
double-stick tape or glue (or
it may just stay there on it's
own).
Weapons
Qualification Badges: Most
have
drop down attachments that
indicate the type of weapon,
etc.,
attach the badge using the
pins then use a
little double-stick-tape
on the drop down
attachments to keep
them in place.
Ribbon
Bars:
Simply arrange the ribbons in
order then push the entire
ribbon bar
down into the foam backing and
it will stay. To verify the
precedence
use http://www.ezrackbuilder.com/
Full
Sized Medals: Some
come with "safety type" pins
not post type pins. If
possible, remove the safety
type pins and attach them with
standard
post type pins that just push
through the foam. Or you can
attach the
medals with the"safety type"
pins using double-stick tape,
but it is difficult to get
them to lie flat with these
type of pins.
Use a
straight
edge or ruler to align the
tops of all of the medals for
a clean,
symmetrical look.
Once the
top part of the medal is
attached then
use double-stick-tape on
the medallion part to keep it
in place.
Mini
Medals:
Most Mini
Medals
come with "safety type" pins,
but they are thin and light
enough to be
attached with
only double-stick-tape.
Use a
straight
edge or ruler to align the
tops of all of the medals
Lanyards:
Most lanyards require
cutting to be displayed
properly.
a. Layout the lanyard on the
Uniform Display to determine
where to cut it on
each end, it should be
slightly curved to simulate
hanging on a real uniform.
b. Use clear glue or clear
nail polish to seal the frayed
edges.
c. Using a razor blade or
scalpel type tool, cut a small
slit along the
edge of
the epauletteon the canvas,
large enough for the top part
of the lanyard to fit in,
this will make it look like
the lanyard is going UNDER the
epaulette..
d. Use a small instrument like
a small screwdriver or pencil
point to lift the
canvas enough for the top part
of the lanyard to fit in.
e. Slide the up part of the
lanyard under the
epaulette.
f. Place double-stick-tape
along the underside of the
lanyard and
position it
as desired, end it at the
sleeve to make it look like it
goes under the
sleeve. If the lanyard has
metal ends that hang down the
front it is a
good
idea to use double-stick-tape
to fasten these in place as
well.
Hat Brass, Pins, or Badges
that have screw type posts:
There are two ways to
attach these devices.
1. Remove the screw posts
if possible and attach the
device with
double-stick-tape.
2. Drill a small hole through
the canvas and foam core to
accommodate the screw post,
the hole should be slightly
smaller than the screw post.
Push the device in and
it may stay by itself, if not
use double-stick-tape to help
hold it in place.
Challenge Coins
Most challenge coins can be
attached with
double-stick-tape, just cover
the
back of the challenge coin
with a lot of it and push down
harder to secure
better.
Heavy Items:
Heavier items such as
metal medallions,
paperweights, heavier
challenge
coins may require
stronger double-stick-tape,
we use an industrial product
from 3M called ATG # 926 that
is 1/2 inch wide and requires
an Applicator Gun. It is
available from U-Line.
But you can usually
find extra
strength
double-stick-tape at local
hobby or hardware stores.
Or you can use glue, but
remember that glued items
cannot be removed or
repositioned.
Non-flat items (belt
buckles, bullets, knives,
etc.)
These items have to be
approached on a case-by-case
basis, most items can
still be attached with
double-stick-tape or glue/hot
glue, but if not here are
some ideas:
Double
Stick Foam Tape: For
items indented from the back
(like large hat brass or
a belt
buckle) - Try using
double-stick foam tape, it is
just like double stick tape
but has foam in between for
added depth to reach inside
the item to secure it.
Hint: double-stick foam tape
also sticks to itself, so it
can be doubled or
tripled if required.
Handi-Tak:
There is also a product called
Handi-Tak made by the makers
of Super Glue,
it is a putty type adhesive
that can be molded. We have
used this to attach
some oddly shaped items.
Floral
Wire: Occasionally
some oddly shaped items cannot
be secured using
double-stick-tape or glue/hot
glue, as in the case with
knifes. To secure a
knife we recommend using
Floral or Wreath wire, it is a
thin, green, easily
workable wire typically used
in fake flower arrangements or
in wreath making.
This is available at any hobby
store that sells fake flower
or wreath making
supplies.
Simply position the object on
the display case and choose
several strategic
locations to poke some holes
through the canvas and the
foam core to run the
wire through. Then simply run
the wire through the holes and
tie the object in
place.
Cut
or Grind the item: If
the item can be cut in half or
grinded down to make a flat
surface, it
may be easier to attach and
look better.
If you want
to get some idea's on what
to put on your Uniform
Display Case,
see our Suggestions
page.
Thank
You

|